

I have had my share of pinterest fails. I don't post them. Goodness knows I don't need to advertise more of my glaring failures. haha! However, I saw this pin on pinterest and loved the idea of beautiful scripture art hanging around my home. I thought, "I can do this!" So, I set out to give it a try. Here is the original pin that I saw.
 |
| source |
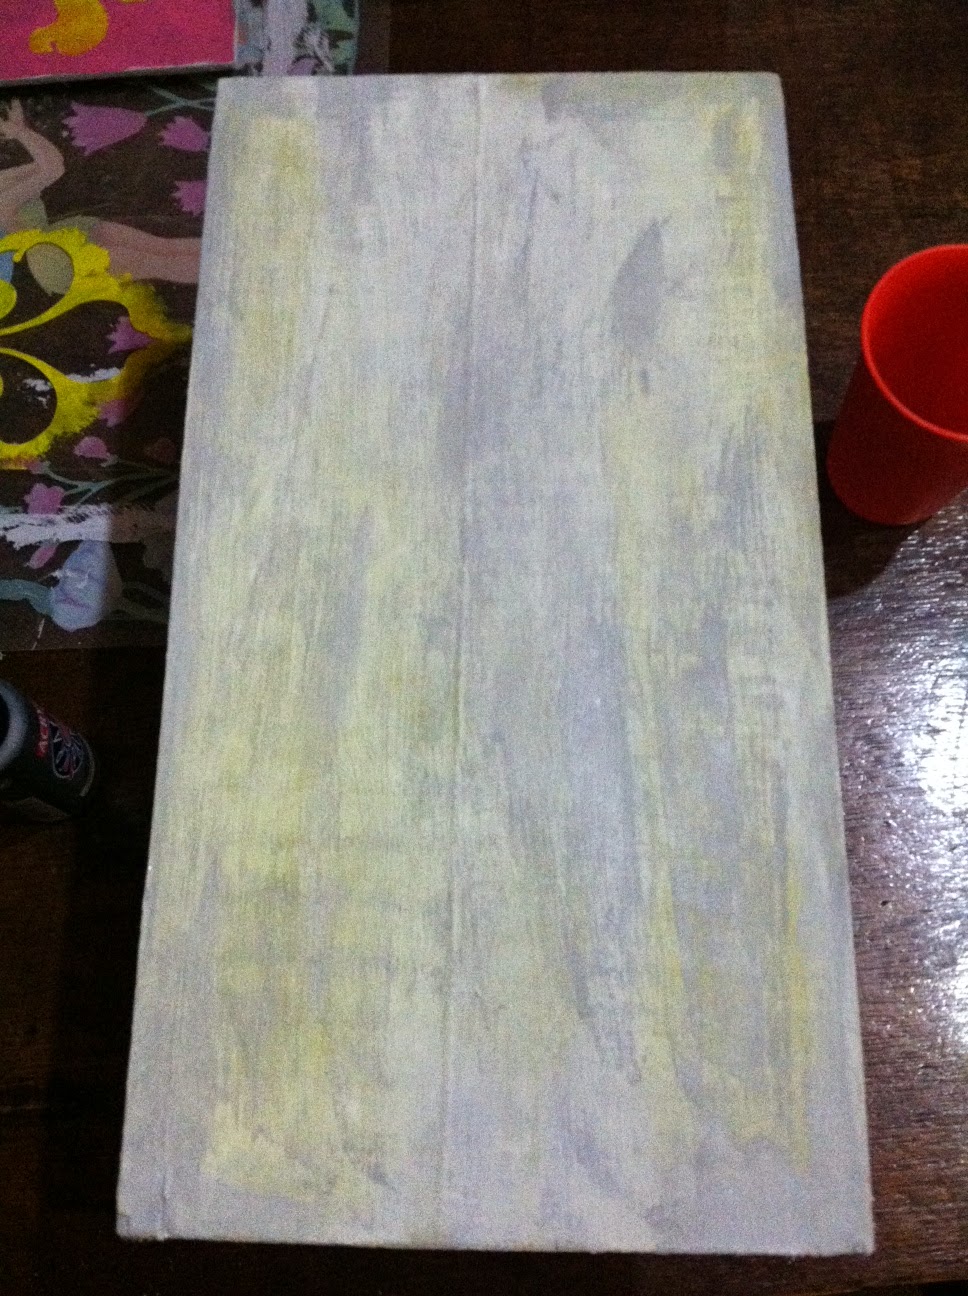
I went into my storeroom and found the perfect scrap of wood and decided to use the same verse and create something that matches my own bedroom decor. I wanted it kinda shabby chic, so I sanded the edges a bit, but it still wasn't perfect and that was ok. I painted a base color of gray. I still had a ton on hand from my recent stenciling project and it was the exact color I needed. After I painted the base coat gray and let it dry, I then painted some streaks of yellow using acrylic craft paint. On top of that, even before the yellow was completely dry, I brushed some white all over the top of the wood. This gave it a rustic painted effect.
I then went into my photoshop program and played around with different fonts to come up with the verse word art to place on my piece of wood. I ended up using two free fonts to create the scripture, Gardenia and KG Somebody that I used to Know. I printed my final draft and then taped it to the wood exactly where I wanted the words to be traced.

Pinterest to the rescue again. I didn't know how to get beautiful wording onto wood until I came across this pin, which gave me all the instruction I needed. The skinny of it is you put your paper on your wood and use a ball point pen to trace the script. By putting pressure you will create an indention in the wood that you can then paint in.

I pressed pretty hard so I would be able to see it. My hand was tired from squeezing the pen when I was done! It worked pretty well, and I could see the details I needed to. I was afraid of painting with the faint lines that I had, so I decided to outline with a gray sharpie first.

I felt a lot better about painting the wood with the stronger guidelines and of course the gray sharpie would be covered up with the gray paint. So, I went ahead with a very small brush and outlined and filled in all the letters. I ended up going over everything twice to give it good paint coverage.

I can still see some minor mistakes, but again...I'm going for shabby chic here. It still had plenty of shabby to it. The next step was to add some flowers. I didn't take any pictures of this part, but I found a very useful youtube tutorial on how to make the fabric rosettes. It is a very simple process. I had the perfect fabric to coordinate it with my room. I had a bit of leftover curtain fabric that I used for one rosette, and then I used a fabric that matched my bedding for the second rosette. My ikea bedding actually came in a drawstring bag. It was the exact fabric of my bedding and I knew that I would never use that bag again so I cut it apart. Perfecto! I added a little gem in the center of the gray flower that I had in my craft supplies. You could adorn the flowers with anything...fancy buttons or old earrings. The final flower was created with felt. I didn't really use a tutorial for this, but I found a pin that basically matches what I did. I hot glued the flowers and the felt leaves onto the wood and the finished product is an adorable scripture art placque to hang in my room!

While the finished product isn't quite as polished as the original pin, I created it myself and that makes it pretty cool. I might just have to do some more. If you want to give it a try, here is the word art file I created to trace. Just click the image and you can download it to your computer. I'd love to see your work if you end up creating something! Be sure to leave me a comment and share!


I had pinned this too - love it, love the verse and you did a great job on yours too!
ReplyDelete