Friday, May 8, 2015

On Family and Pizza


Family and Pizza...these are a few of my favorite things. :)

I'll get to the pizza in a minute, but first a quick update. Life has been rather busy lately! Whew!  I had the privilege recently to speak in a Pastor's wives conference. There was a group of about 15 pastor's wives that came and we had a wonderful time of fellowship around the Word of God. I enjoyed getting to know some of the ladies better. Public speaking isn't my thing, but the Lord gave grace and wisdom and I'm so thankful for that.

I have enjoyed discipleship opportunities. Freda comes up each Tuesday after to school to go through our discipleship course, The Spiritual Growth Series.

My husband wrote this course several years ago and it has been such a helpful resource. Freda is really growing and she has a real burden for the salvation of her entire family. Pray along with us that we can see her family come to Christ. I am also meeting with Anita each Thursday evening after our midweek Bible study here in Bambili. Anita came to me a few Sundays ago expressing concern about her salvation. After some council she expressed to me that she'd already made a decision for Christ and so we went over some scripture about her security in Christ. I encouraged her to go through the Spiritual growth series as well and so we have started. I'm excited to see the Word of God change Anita.

Our annual missionary family camp is over and we had a wonderful week of fellowship with likeminded missionaries here in Sabga, Cameroon. Pastor Don Barth came from the states to speak to us. My responsibility each year for camp is the organization of the meals. Each missionary lady takes charge of one meal, and I don't do a lot, but I do create a schedule and try to make sure it runs smoothly. We also do a lot of the shopping for the food supplies for the week.

I always schedule my meal for the first night at camp...Monday supper. About three years ago we bought a gas grill off of a missionary family that was leaving Cameroon. I somehow stumbled onto a Pizza recipe created for the grill and our family fell in love. I was adventurous one year and made these grilled, personal pizzas for family camp and since then I've been doing it every year. This was year three. I take my grill up there and start cooking about two hours before meal time and everyone gets their own little pizza.

Since this recipe is such a hit in our family I thought I would share it with you! I have had a lot of people ask me how to cook pizza on the grill. The blog I found had pictures and all of the information, but I still was a bit nervous. I thought I would add some video clips so you can see exactly how I do it. If a picture is worth a thousand words, than a video is worth a million. :) Hopefully it will be helpful.

First thing I do is make my dough. I do this in my bread machine and here is my recipe:
2 c. water
1 TB olive oil
1 tsp salt
1/2 tsp sugar
5 c. flour
1 TB yeast
Put all of your ingredients in the pan in that order, set it to dough cycle and let it work its magic. :)

This recipe makes 8 personal pizzas for our family.  While the machine is working I make my own sauce. I take two packets of tomato paste, which is about the equivalent to two small cans. I add water until it is pizza sauce consistency and season with garlic salt and italian seasoning. Very simple, but we love it. I shred my cheese and cut up my veggies. When my dough is done, I take it out and divide it into 8 evenish pieces and roll them out into personal pan size.

I take all my goodies to the grill. Before placing the dough on the grill I brush one side with olive oil and sprinkle some garlic salt on it (we love garlic salt!).


Make sure your grill is nice and hot, and flip your dough, oil side down onto the grill. Here is a quick little video clip so that you can see it in action.

Once you get your dough on there (excuse the dirty grill...I do live in Africa), close that lid and patiently let it cook for a couple minutes. My grill runs hot, so the timing probably depends on the grill, but once you notice your dough puff up and look dry and cooked, not wet and raw, it is time to brush the top with oil and flip the dough. This is what it should look like.


Here is a little clip of me flipping the dough again (You can't say I didn't explain this process very clearly!) :)

Once you have brushed that side with oil and flipped it, now it is time to top your personal pizza. Let your creativity soar with the possibilities. Our standard toppings are sausage, pepperoni, onions, tomatoes, green peppers and green olives. Another favorite is chicken alfredo pizza. I would love to get some frank's hot sauce out here and try some buffalo chicken pizza. The options are almost endless. Close the lid and let your topped pizzas cook a couple more minutes so the dough can finish cooking and all the cheese can melt.

The finished product is a tender, flavorful crust with ooey, gooey cheese and yummy toppings. It will be like a flavor explosion in your mouth! So much better than pizza in the oven...trust me!

What can I say...we are a pizza loving family. Some people have Taco Tuesday, we have Pizza Friday. it is just our family tradition. We rarely stray from cooking our pizza on the grill, but occasionally we do something different. For family day two weeks ago we didn't have a gas bottle hooked up to the grill so we made our own personal pizzas and baked them in the oven. The kids had fun creating a unique pizza...some with faces, others in shapes.

It was a fun thing to do, but our favorite pizza method is definitely the grill. Try it - I guarantee you won't want Pizza Hut ever again!
Pin It!

Monday, April 13, 2015

Pinterest...for the win!


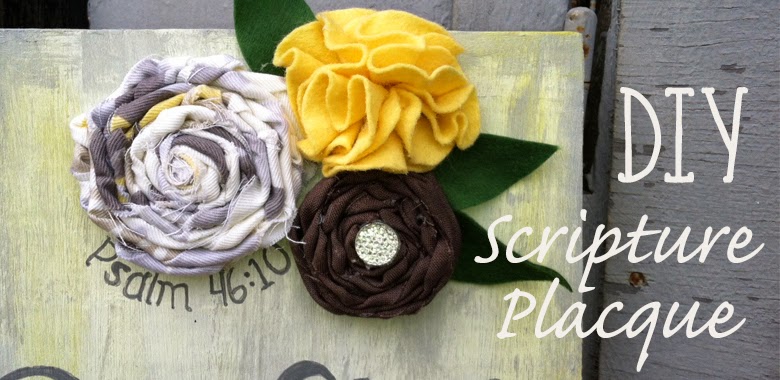
I have had my share of pinterest fails. I don't post them. Goodness knows I don't need to advertise more of my glaring failures. haha! However, I saw this pin on pinterest and loved the idea of beautiful scripture art hanging around my home. I thought, "I can do this!" So, I set out to give it a try. Here is the original pin that I saw.

source
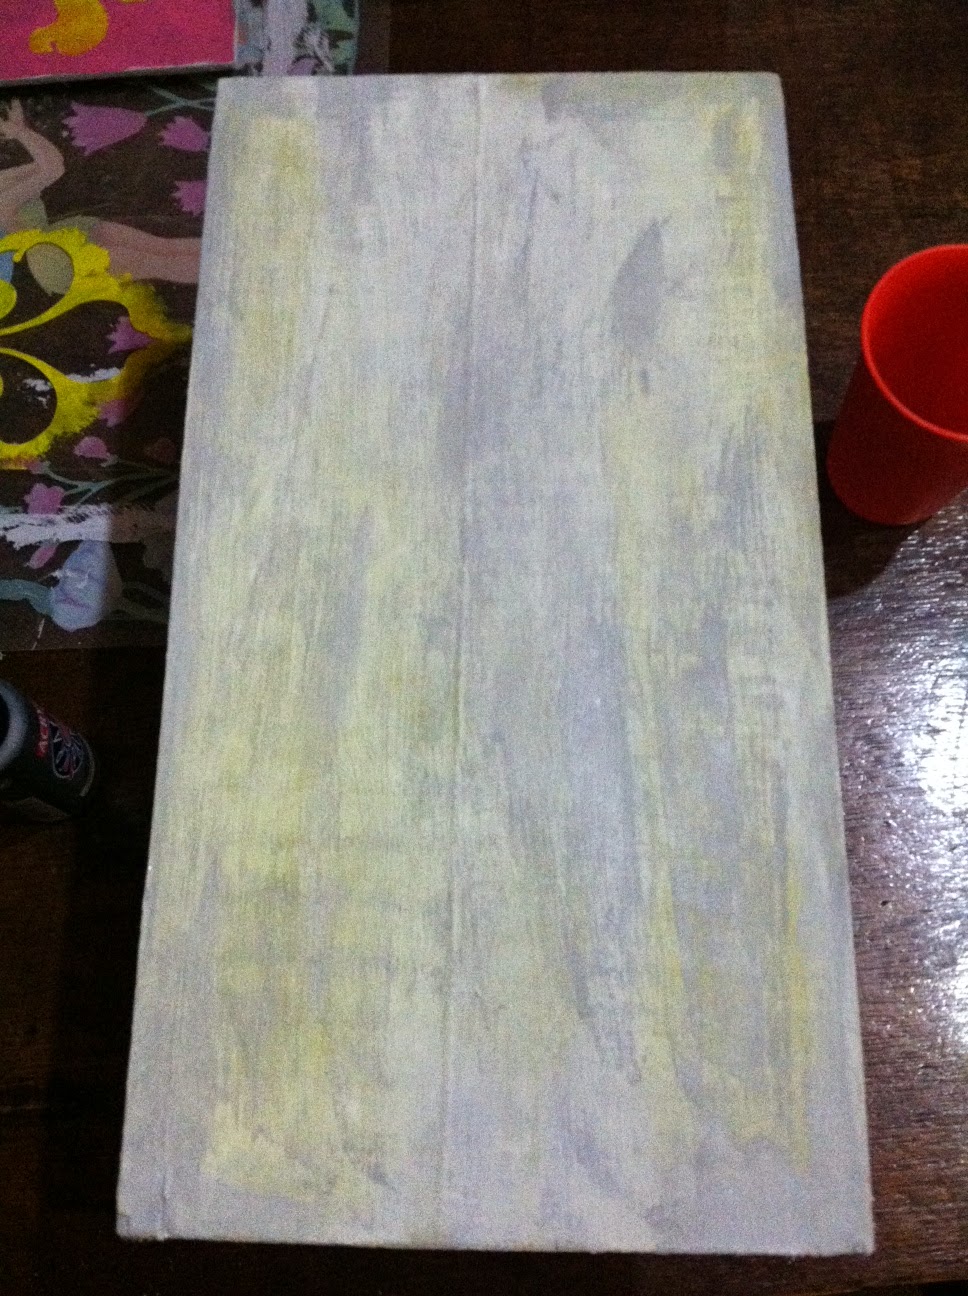
I went into my storeroom and found the perfect scrap of wood and decided to use the same verse and create something that matches my own bedroom decor. I wanted it kinda shabby chic, so I sanded the edges a bit, but it still wasn't perfect and that was ok. I painted a base color of gray. I still had a ton on hand from my recent stenciling project and it was the exact color I needed. After I painted the base coat gray and let it dry, I then painted some streaks of yellow using acrylic craft paint. On top of that, even before the yellow was completely dry, I brushed some white all over the top of the wood. This gave it a rustic painted effect. 


I then went into my photoshop program and played around with different fonts to come up with the verse word art to place on my piece of wood. I ended up using two free fonts to create the scripture, Gardenia and KG Somebody that I used to Know.  I printed my final draft and then taped it to the wood exactly where I wanted the words to be traced.


Pinterest to the rescue again. I didn't know how to get beautiful wording onto wood until I came across this pin, which gave me all the instruction I needed.  The skinny of it is you put your paper on your wood and use a ball point pen to trace the script. By putting pressure you will create an indention in the wood that you can then paint in. 


I pressed pretty hard so I would be able to see it. My hand was tired from squeezing the pen when I was done! It worked pretty well, and I could see the details I needed to. I was afraid of painting with the faint lines that I had, so I decided to outline with a gray sharpie first. 


I felt a lot better about painting the wood with the stronger guidelines and of course the gray sharpie would be covered up with the gray paint. So, I went ahead with a very small brush and outlined and filled in all the letters. I ended up going over everything twice to give it good paint coverage.


I can still see some minor mistakes, but again...I'm going for shabby chic here. It still had plenty of shabby to it. The next step was to add some flowers. I didn't take any pictures of this part, but I found a very useful youtube tutorial on how to make the fabric rosettes. It is a very simple process. I had the perfect fabric to coordinate it with my room. I had a bit of leftover curtain fabric that I used for one rosette, and then I used a fabric that matched my bedding for the second rosette. My ikea bedding actually came in a drawstring bag. It was the exact fabric of my bedding and I knew that I would never use that bag again so I cut it apart. Perfecto! I added a little gem in the center of the gray flower that I had in my craft supplies.  You could adorn the flowers with anything...fancy buttons or old earrings. The final flower was created with felt. I didn't really use a tutorial for this, but I found a pin that basically matches what I did. I hot glued the flowers and the felt leaves onto the wood and the finished product is an adorable scripture art placque to hang in my room!

While the finished product isn't quite as polished as the original pin, I created it myself and that makes it pretty cool. I might just have to do some more. If you want to give it a try, here is the word art file I created to trace. Just click the image and you can download it to your computer.  I'd love to see your work if you end up creating something! Be sure to leave me a comment and share!


Pin It!

Friday, March 27, 2015

Deep Dish Pizza

Date Night is something I look forward to every week. We have to be creative here in Cameroon. We can't go out after dark here and there is no such thing as "fine dining" in Bamenda. However, there IS fine dining at Chez Sinclair's every Wednesday night.

Each Wednesday I prepare a favorite meal for Ben and I. We have family devotions, put the kids to bed and then Ben and I enjoy a meal together and watch a movie or something to spend some time together. One of my favorite meals to make is Deep Dish Pizza. My mouth is watering as I type! :) This dish is so easy and Oh so yummy!


Here are some instructions on how to make this sure-to-please dish:

First thing you will want is a pizza dough. You can buy a pre-made dough if you prefer, you can make it by hand or you can use one of my favorite appliances...a bread machine.  Here are the steps for the bread machine method:
1. Put 2/3 c. of water in bottom of bread machine pan
2. Add 1/4 c. of olive oil
3. Add 1 tsp. each of dried oregano, basil, and marjoram
4. Add 1/2 tsp. garlic salt and onion salt
5. Add 2 c. of flour
6. On top of your flour add 1 pkg. (.25 oz) of yeast or I add 2 tsp. from a bulk package.

Once you have your ingredients in your pan and machine, set your machine to dough and start 'er up! This is the actual recipe from my recipe book. It makes the perfect amount of dough for this recipe. I have absolutely no idea where this recipe originated from, so I can't give any credit, however it might have been from Taste of Home magazine.

I'm actually a little lazy when I make this. I add the proper amount of water and olive oil. I then throw in a TB of Italian seasoning and shake in a bunch of garlic salt, add the proper amount of flour, the 2 tsp. of yeast and I'm done! You need to be specific about some things, but you learn over time what you can adjust.

While your dough is rising you can prepare the yummy filling. For the filling you will need:
1 lb. ground beef
1 tsp. ground sage
1 tsp. salt
1 tsp. fennel
peeled, diced, and seeded tomatoes
1-2 green peppers diced
1-2 garlic cloves, pressed
shredded mozzarella
about 40 slices of pepperoni

As you can see some of my measurements are general. I cook everything to taste with this recipe. I don't do a lot of measuring.

The original recipe called for sausage. A friend of mine, Becky Branch, gave me a cook book that she had created a long time ago and it included a lot of substitutions. A recipe for sausage was one of them and it used 1 lb. ground beef, 1 tsp. of sage and 1 tsp. of salt. I have used this recipe for years with all sorts of sausage recipes, one of our favorites being sausage gravy and biscuits. It is a wonderful substitute and, depending on how lean your meat is, can be a lot lower in fat. So, I substituted this sausage recipe to be used in this pizza. I also added the fennel because that just gives the ground beef an extra sausage kick. If you are a big sausage lover, by all means...use the sausage instead.

Cook your ground beef, onions, garlic and green peppers in a skillet. Add your sage, salt, and fennel and combine very well. The more onions, peppers and tomatoes you use, the fuller your pie filling will be.  Add your tomatoes and cook the mixture down. This is purely preference here, but I hand peel and dice my fresh-from-the-garden tomatoes. I can't handle tomato skins sticking to the roof of my mouth. If that doesn't bother you, just skip the peeling part, OR buy some diced canned tomatoes (be sure to drain them). The seeding part is important, but if you forget, like I did the other night, no worries. Just be sure to cook your mixture longer to cook off all of the extra liquid. You don't want your filling to be runny. Again, I can't give you an exact amount because I don't measure my tomatoes, onions or peppers. I just throw a lot in there. You can use your judgement here.

Once your meat mixture is done you will roll your pizza dough into a large circle and place in the bottom of a 12-inch cast iron skillet that has been buttered or oiled well. Let the dough hang over the sides until the pie is filled. Place some shredded mozzarella on the bottom, add meat mixture, cheese and slices of pepperoni.


Repeat the layer again: Meat mixture, cheese and pepperoni. Fold the dough under to form a crust. It will want to sag down...no worries. It will still look pretty when it goes into the oven.


And it will look even prettier coming out of the oven!


This dish is SO good it will rival any Chicago pizzeria! Give it a try - you won't be disappointed! When mine came out of the oven I made an herb butter to brush over the crust. I just melted some butter, stirred in some parmesan cheese, garlic salt and Italian seasoning. Mmmmm! So tasty!

People often ask me what are some of the things that I like to bring back to Cameroon and I always answer by saying pepperoni is at the top of my list. This dish is why! We are a pizza loving family and for me, if it doesn't have pepperoni on it...it makes me sad. We have run out of pepperoni many times while being on the field. Pizza night isn't quite as exciting for me, but our best substitute is using the above sausage recipe to top a traditional pizza. The kids now prefer it to regular sausage.

Let me know if you give this a try and how it turned out!
Pin It!

Tuesday, March 24, 2015

Super Room for a Super Kid

Leaving the States can be hard on missionary kids. They miss out on a lot of things. Aside from the fact that we go years without Chick-fil-a nuggets and fries, the goodbyes to family are difficult to say the least. (Family and waffle fries are in a tight run for first place, though.) My husband continually keeps before the kids and me the incredible calling that God has placed on our family. During our family devotions a short time before our return to Cameroon, he shared many of the advantages of being a missionary. One of them that was a huge blessing to me was the fact that as missionaries, we don't have many earthly ties. We don't own land or houses. We don't really even have a solid place to call our home. We bounce back and forth between two cultures and we don't fit into either of them perfectly anymore. I don't say any of this to make you feel sorry for us. In reality, we have an advantage because our eyes can be more fully on our permanent home...heaven! Our focus has an advantage of being on the eternal without all of the earthly distractions. I don't want anyone to think we are super christians...I merely said we have an upper hand. This doesn't mean we have mastered it by any stretch of the imagination.

I say all of this as a preface to this post. I don't want anyone to think that I have to promise my kids material things to get them to return to our mission field of Cameroon. They all love living here. This has become very much home to them. To keep it exciting, however, I gave them something to look forward to upon our return. I wanted to add to the anticipation of going back home to Cameroon.

A couple of months before our furlough I told the kids that when we came back from the States we could redecorate their rooms. We had all of furlough to keep our eyes open while shopping...to get ideas off of the internet and choose how they wanted to style their room. The kids and I had a lot of fun browsing through pinterest boards and walking through the aisles of Hobby Lobby taking tons of pictures for ideas on what to do in their rooms. We came back bursting with ideas and we lost no time into putting those ideas into action.

Pastor Eugene is a member of Faith Baptist Church and an incredible artist. We sold many of his paintings while we traveled on furlough. He was the perfect person to reinvent Drew's boring room. Here is a before picture of Drew's room:


Ben's mom made Drew a John Deere quilt when he was small, so that was his original theme. I stenciled tractors on the border of his room and that was pretty much the extent of my decorating abilities. You can see hints of Drew's ideas in the before photos though...superheroes. He wanted a grown-up looking super hero room. Pinterest was my best friend and if any of my blog readers follow my Pinterest board, you saw my pins from the last couple of months, and you probably already have an idea of what his room is going to look like. I printed the photos that I found on pinterest, explained in detail to Pastor Eugene what we wanted and let him loose. I trusted his artistic judgement and knew he would do an amazing job piecemealing my ideas into an amazing work of art.

The idea was a faux brick wall. I brought back a mop sponge from the states, and he used this as the basis for the bricks. He brushed paint onto the sponge and then basically stenciled it on the wall. He painted the two accent walls with a gray base paint to resemble the mortar/cement for the bricks and then he got to work adding the brick. The base brick was done in an orangey color reminiscent of Georgia clay. He left open spaces for other brick colors at first. He began to fill those spots in with a red brick color. At that point I wasn't really happy with the orange. When I think of brick, I think of red. This is where culture comes in. The bricks in Cameroon are made of mud and most of the houses are the orangey color. So, when he thinks "brick" the color that comes into his mind is orange, and when I think "brick," I see red. So, after I explained this and showed him some more photos online he adjusted things, and the result was amazing and so very realistic!  He wasn't finished there, however. He told me he was going to add some black since often you will see bricks that are burned. I thought that was an amazing idea and it really added some depth and dimension to the look!


Here you can see the finished brick work. The piece de resistance, however, is the amazing mural that Pastor Eugene painted on the wall. Originally we were going to have him paint one brick wall, and then on the wall you see above, have a very cartoon looking blocked cityscape. Kind of like this:


Drew had a different idea, however. Late one night as I was walking into my bedroom and Drew should have been fast asleep, I heard a whisper out of his room, "Mom!" He proceeded to share his super cool idea of having a realistic cityscape, but he wanted it to appear like you could view it out of a broken brick wall. So, we explained the idea to Pastor Eugene and he did an amazing job of bringing Drew's idea to life!


Here is a collage of all angles of the finished product. 


The other two walls are white and we have commissioned Pastor Eugene to do some very cool Super Hero artwork on canvas. I can't wait to show you those when he is done! We are so thrilled with the finished product. Drew couldn't be happier. Each day that Eugene would come to paint, we would sneak in there and watch the progress. Here are a few more photos. In addition to the ones above, this will give you a better idea of the progression of his work.


So there you have it. A super room for a very special and super kid. Today the final coats of oil paint went on the trim in the room. Drew has to wait a couple more days for all of that to dry and then he can move back in! He is pretty excited ... and also pretty tired of sleeping on the floor! :) haha!

Here is a little sneak peek into something I'm doing to freshen up my own bedroom. I'll be sure to blog about it when I'm done with my little project as well.


Pin It!

Tuesday, March 3, 2015

Home Again...Home Again...

One of the things that just blessed my little heart (<--- it's a southern thing...) while on furlough was the many comments that I received, traveling from church to church, about my blog. So many of you expressed your appreciation for it and I was so thrilled to learn that many of you read my blog. It made me SO happy! Because of your sweet encouragement I determined to be a faithful blogger once I returned back to the Cameroon. So...here I am. I'm back and I'm excited to keep up with this little blog and continue to give you a glimpse of life on the mission field.

There is no way I could summarize all of the amazing details of our furlough. God provided us with an amazing house to live in. It was so beautiful and in a quiet, secluded location. We saw more wildlife driving up our driveway than we ever see here in Cameroon (goats and chickens don't count, by the way!). We saw deer very frequently, bunnies, foxes, owls, woodpeckers, chipmunks and raccoons. It was like living in an enchanted forest!


We were also very privileged to make some wonderful memories with our families. My kids were so blessed to get to know their cousins better on this furlough.

We got to do a lot of fun things with them and our goodbyes were very difficult ones. Probably the most difficult, in fact. Jay and Sarah left for the mission field of Venezuela less than a week after we left for Cameroon. We are praying about how we can coordinate future furloughs, but the thought of possibly not seeing one another until little Ellie is 8 years old is just too much to think about right now. We are so thankful for modern technology that will allow us to keep in touch! Please pray for both our families as we seek to be faithful servants in the countries that God has called us to.

We were able to enjoy a special trip to Maine with Ben's parents, Pat and Jerry.  We caravanned up to Bangor, ME and stayed with Pat's family. A big family reunion was held and it was the first time that I was able to meet much of the extended family. We also stayed on the coast of Maine in Ogunquit and enjoyed the ocean. It was beautiful!

We got to take a special trip with my parents to Disney World. Two of my brother's kids, Sam and Luke, also came along and the kids had a blast sharing the trip with their cousins. My dad, who isn't a big lover of crowds or schedules, was a trooper and so very patient with us. We made so many special memories that week!

We also got to see many of our supporters. We traveled from the coast of Maine to the coast of Florida...even to the Pacific Northwest! We stayed in so many homes and enjoyed many hours of fellowship. Our heartfelt thanks to all who hosted us. We enjoyed our time with each one of you!

Most of our last couple of months were spent with friends and family. We enjoyed a wonderful Thanksgiving with Ben's family and a wonderful Christmas with mine. At the beginning of January I accomplished a goal worth mentioning...I ran my first race - a 10k. It was a huge accomplishment for me and I really enjoyed doing it! Two of my dear friends, Beth and Sherry, and I went to Florida to run in the runDisney marathon weekend. I love my gigantic medal!

January was squeezing in all the final moments with our friends and family. Ben's parents came down to spend a week with us and we really enjoyed our time with them. We had several family get-togethers to celebrate holidays and birthdays. Each moment with each loved one was so special and I'm so thankful for all of the wonderful memories that the Lord allowed us to make while we were home.

We spent the first week of February celebrating my mom's 60th birthday and packing up our house to leave. I think the lack of sleep during that week of packing made me especially emotional. Saying goodbye is SO very hard. Honestly, what makes it so hard for me is watching my kids struggle with goodbyes. Their broken hearts just rip mine into shreds! Ugh...it is SO hard saying goodbye over and over from one side of the ocean to the other.

On Feb. 11, with our final goodbyes said to my parents at the Atlanta airport, we could finally set our sights on Cameroon. Our feelings of sadness morphed into feelings of anticipation of being back home. Our journey across the Atlantic was long and it wasn't without its struggles, but I saw the Lord work so mercifully on our behalf! Kate was so sick for the first flight. She gets airsick from flying and just vomits and vomits. Her flight was a miserable one and she arrived in Paris exhausted from hours of heaving. She caught bits of sleep on the hard airport floor during our 10 hour layover.


I asked my Facebook friends to pray for her second flight to be smoother, and it was, PTL! I also asked prayer for a smoother second flight. The turbulence was so bad on our flight from Atlanta to Paris. Almost the entire time the plane rocked and bounced. You could feel it swerving and dipping, lifting us out of our seats at times. It was really frightening. I did a lot of praying on that flight, I'll be honest! The second flight was as smooth as silk. No turbulence and some of us actually were able to doze a bit. Overall none of us had gotten any sleep to speak of since Tuesday night. It was now Friday morning in Cameroon and we arrived at the airport, collected all 30 bags (That is also a HUGE answer to prayer!) and loaded into our Land Cruiser and began the 7+ hour journey back to our home in Bambili. I was really thankful to have a collection of Air France barf bags in my backpack because Kate wasn't the only one that got sick from the traveling. The lack of sleep, among other things, finally wore Drew down and he was also purging at the beginning of our trip to Bambili. (He was walking around the baggage claim department with his head hung over one of those bags. We were asking him to be discreet about it since they were doing ebola screenings and I was sure that the white bag would draw lots of attention to us. haha!) Emma was also hanging her head over a bag, but she finally fell asleep and slept a big chunk of the drive home which was a help to her since she suffers from car sickness. Oh the things we do to our kids! Pray for missionary kids. Not just mine...but all of your church mk's! They sure get put through the ringer!

An hour out of Bambili we were playing 20 questions with Ben who could have used toothpicks to keep his eyelids open. Ezekiel was about a half hour behind us in a rented van that was carrying all of our luggage. We ended up arriving home before our luggage did and praise the Lord He kept us safe the whole way. It was now Friday evening and we still had not had any sleep to speak of since Tuesday night. Exhausted can't begin to describe how we felt. We bathed our doggie, Georgia, waited till our bags arrived and loaded them into the parlor, ate a delicious supper of Fufu and Njama Njama, provided by our dear friend, Diane, and went to bed at 9 p.m. We slept 15 hours straight through without waking up!

We have now been here a couple of weeks. We are still trying to get settled. We had to wash everything that was in our closets and drawers. Jim and Myra Wright, who lived in our house and oversaw the ministry while we were away, did an amazing job! Our house was clean when we arrived and everything taken care of. Unfortunately two+ weeks of dry season dust still had to be dealt with and clothes in storage, even while living here, have to be washed after a moldy, wet rainy season. That is just life in Cameroon. We are already jumping back into ministry. Ben is out this morning even, at a military base with the intent of sharing the gospel with some Cameroon soldiers.

To those that pray and support us...Thank you! We couldn't do it without you. I don't know what the next blog installment will be, but I thank you for walking this journey with me. I'll try to keep it interesting. :)  It would also mean a lot to me if you would share my blog and encourage others to read it!
Pin It!

Monday, August 19, 2013

La Casa De Sinclair | The Kitchen

I am so sorry that it has taken me so long to get my first home tour post up.  We have been doing some serious work on the house and I didn't want to take any pictures until I was happy with the finished product. All week I scrubbed my kitchen down from top to bottom; I sewed (or actually re-sewed) my kitchen curtains, and while there are still some things to be cleaned in the kitchen (won't there always be???) I finally feel ready to present it to you.

This is one of my favorite rooms in our house, but it wasn't always that way. The biggest problem for me when we first moved in was the vermin - specifically mice and an infestation of roaches. As I mentioned in my last post, the former tenants did have pigs and chickens living in the next room.  The day that I realized I had a serious roach problem was when I was cleaning out a spice rack that is on the wall and decided to empty it out and spray it for bugs.  I had NO idea what was going to happen next...20 HUGE roaches crawled out from behind that thing.  Not all at once of course, but they slowly came staggering out and up the wall. I stood there with a broom in my hand, knocking then down off the wall and then crushing them beneath my shoes.  Oh...I really hated the kitchen!!  Well, the game changer was when Ben decided to have the bottom kitchen cabinets ripped out and completely re-built.  He hired someone to lay a concrete slab so that the cabinets were built up off the floor. This drastically helped with the mice problem. Somehow they were getting in under those old rotted out cabinets. He also ripped out the tile back splash. The roaches had made a home in the back splash up in the grooves of the grout. Once we tore out the cabinets and the tile, I have never had a roach problem since (I do see an occasional mouse, but read here for my solution to that problem).  We do live in a tropical country and so I do have to stay on top of it. I keep roach baits out and I will see them every once in a while. They often come in with the groceries or on the eggs. But thank the Lord (and my amazing husband) I rarely see roaches anymore.   So, without further ado...my kitchen :)
click on any picture to see it enlarged
This is the view of my kitchen as you are entering the door coming from the courtyard.  The only minor thing I dislike about the room is the tile on the floor.  It is old (30 years or so) and dirty from years of being trampled over with, depending on the season, muddy or dusty shoes.

You can see our temporary dog, Georgia. We are dog sitting for friends and fellow missionaries, Don and Karen Winch, while they are on furlough. We keep Georgia's cage here in the kitchen. She's cozy in that corner of the kitchen, especially when I'm running my oven. Her Douala-thinned blood isn't used to this cold Northwest climate! I also pointed out our "Wall of Fame."  We love to put prayer cards, Christmas cards, wedding invitations, you name it...on our fridge.  If you are up there, you are most definitely famous! If you aren't up there - you better send us your picture quick!

If you turn your head to the left, you will see this little nook:

We keep our water filters here. Veggies go in the hanging baskets and my eggs in that beautiful green bowl.   The two-door plastic cabinet is where I keep small appliances.

One addition we made when we rebuilt our cabinets was the addition of drawers. There were no drawers in the kitchen and we designed it so that we had a set on this side of the cabinets. I love them - they are big and deep. I don't know what I'd do for storage without them!  The top cabinets are the ones that were in the house when we moved in. We did, however, paint the kitchen ourselves.  Thankfully my husband is a painter because it is a lot of work keeping up with all of our walls! I did the simple ivy stenciling shortly after we moved in almost 9 years ago.  It has held up quite well.

Now I'm standing in the little nook, taking a picture over the counter top you see in the previous shot.  This just gives you a little better view of my stove and my pot rack - another treasure I had made here. I have always wanted a pot rack! Right next to the stove is a little black shelf that Ben made to cover the ugly orange gas bottle that my stove and oven need to run.  It is also very handy to have next to the stove when I am cooking. I keep my matches there and a spoon rest. It is the perfect set up.

You can probably tell from the picture but our fridge is super small.  I have learned that I don't really need a huge fridge.  The only thing that was a challenge at first was the size of my freezer. We eventually bought a chest freezer and that gives me the perfect amount of cold storage space.  We mostly use the small freezer space in our fridge for ice and we keep all of our frozen food items in our chest freezer.

Here you can see my sink and counter space.  When we were rebuilding the bottom cabinets we found these huge 2 ft. ceramic tiles that were perfect for our counter top. We hired a plumber/tile worker to install them and they are absolutely perfect. Originally the counter was covered with these tiny tiles and I didn't even have a place to roll out a pie crust.

Our sink was a single and Ben changed it to a double for me. Our faucet was a single and Ben got a mixer for me and also installed a brand new water heater. The first time we tried to turn our water heater on, we realized that it didn't have any water in it. We opened up the valve to fill it, and the water started pouring out of the heater like a sprinkler! Evidently, it had sat unused for so long it had tiny, rusted holes all throughout the heater.  Once the new water heater was in, and the new faucet, I could do dishes without heating water on the stove! What a time saver!

The black table that you see in this next photo was already in the kitchen when we moved in. It used to be the same color as the spice rack above it. Both were built and installed by former missionary, Dale Crawford. From what I understand he was quite the woodworker and we can see touches of his handiwork throughout the house. That rack was the infamous "roach rack" as mentioned above. :)  Ben added some hooks underneath and it displays our beautiful, locally made, pottery.  Don't be fooled though - we aren't coffee drinkers. You will find my coffee pot stored in the top, back corner of my cabinets. When guests come, I dust it off in hopes that it will still work. The coffee mugs just look pretty hanging there and we do occasionally make a cup of hot tea.

These next  two views of the kitchen are from the opposite side of the room looking back towards the entrance. You can see the water filters again, and the smaller window that is on this side of the kitchen.  Much of the work that we have recently been doing to our home has involved these windows that face the courtyard. For the 9 years that we have been here, the windows were covered with an ugly metal grate.  This grate made it impossible to clean the glass because the holes were too small to reach through. The dust, grime, cobwebs, and ick that had built up was absolutely gross.  There was nothing I could do about it though. The windows were nailed shut from the outside and that grate kept me from properly cleaning them. Ben recently decided to have new metal bars made and installed from the inside that would keep our house safe, but would look so much neater than what was previously there. This past week we ripped out the metal grates from all of the courtyard facing windows, painted the trim, scrubbed the glass and installed the new metal bars.  Without a before and after picture you can't really understand the difference, but trust me when I say it is amazing. I mentioned that I re-made my curtains this week. Before, I had one long curtain (from the same material) that covered the entire window - mostly to hide the filth behind it. Now I can showcase the window and it allows so much more light to come into the room!
Ok, the final view is looking at the door that enters the kitchen from the courtyard outside. You can see my chest freezer that I mentioned. It used to be in my laundry room, but that space next to the black table was absolutely perfect for it. It also gives us an extra little bit of "counter" space, so-to-speak.  More often than not, it ends up cluttered with a little bit of everything. We all enter the house, and drop our things like Bibles, purses and even toys, rather than putting them where they belong. Whenever I actually need to get into the freezer, it ends up being a bit time consuming, lol! And as you can also see, I've marked the photo with an arrow pointing towards the rest of the house.  From this point on, I hope to go in order and share each room with you as I take you on a tour through our home. So, next up:  The office.  (I need to do a bit of cleaning first) :)

I hope you enjoyed the first installment of our home tour.  I never in a million years dreamed I would have a house this nice here in Africa!  In college I had visions of mud huts, with grass thatched roofs.  God has truly blessed us with a gorgeous home, and I know I say it all the time, but it is big enough for lots of visitors. If you have ever had a desire to see a missionary work in an English speaking third would country on the continent of Africa...we are your people! We'd love to have you!
Pin It!

Thursday, July 25, 2013

La Casa De Sinclair | Part 1

Have you ever wondered what a missionary home looks like?  Of course missionary homes across the world are quite different, but how about a home located in the interior of Cameroon? I know that when people think of homes in Africa, they often think of grass-roofed mud huts. And while you will find grass-roofed homes in certain areas of Cameroon, we are surrounded by homes with tin roofs that are constructed of either cement, or mud blocks ...with the latter being most popular due to the low cost.

The search for our home began very shortly after we moved here. We were living with the Needhams and Tom was taking Ben and Matt around the Bamenda area looking for housing.  We had about exhausted all of the possibilities in Bamenda, when one day Tom suggested that they check out the "old Crawford house." What is very interesting (and I might have already told this story...skim past if you've already heard it) is that Ben and I stayed in this very house when we visited Cameroon during our college days and before we were even married.  Former GFA missionary Dale Crawford and his family lived and served here until health problems required them to return to the states. We spent a weekend with the Crawford family to get a glimpse of their ministry. The day that Tom suggested they stop by this house nobody was around. They peeked in the windows and weren't able to actually see anything, so Tom suggested calling the landlady, Susan Tebong.  She informed them that a tenant had recently moved out and she was in the process of fixing up the house to rent it out again!  They arranged a day to view the home with her and on that day Ben made an offer. Evidently she'd already received an offer from some Catholic nuns looking to rent the home, but Ben's offer happened to be higher, so she accepted!

Even though our landlady had painted and cleaned, the house was still in rough shape. I actually came down and cleaned and scrubbed some more before we moved all of our things in over Thanksgiving weekend.   The last tenant had raised pigs and chickens in the house, so you can imagine all of the filth!  It took me a very long time to feel like I was living in my own dirt, and not somebody else's, if you know what I mean! Slowly but surely we worked on the house and it eventually came to feel like home.

It honestly is a continual work in progress.  We are constantly painting and working on home improvement projects. The most recent was to add new doors and screen to the house.  But, I thought it would be a fun blog series to give you a tour of our absolutely gorgeous home. So, today I'm going to start with a diagram of the layout of our house!


I will explain a few things about this (very bright!) diagram. As you can see our house is in a "U" shape.  The courtyard portion is outside. All of the black lines signify the location of doors that enter the interior of the house.  The big black line at the front of our courtyard is actually a large iron gate that we slide open and shut for an extra measure of security. Half of the courtyard (the front half) is covered by a roof.  We have a table, grill, containers for water, etc... all stored out there. The back half of the courtyard that is butting up to the house is mostly open. There is a little garden in that section.  In a future post I will share photos and it will give you a better idea of what I'm talking about.

The "outside laundry/store room"  is the only room that is not connected to the inside portion of the house.  It is kind of like our garage, but without the car! Ben keeps all of his tools in there, and my washer and dryer are in there as well.  I have to go outside the house to do my laundry, but I'm always under a roof, and the gate is locked, so I'm completely safe.  

We have four doors that actually enter the inside of our home.  The kitchen door is the door we primarily use.  The two doors at the back of the courtyard have just been redone.  We added metal doors there and changed the wood doors that were there into screen doors. This is SO nice because I can open up the metal doors during the day and the screen doors allow a breeze to flow through the parlor!  The metal doors are also added security. The door at the front of the parlor is a big double wooden door on the inside. and then a big iron door on the outside.  We recently added screen to the iron door as well, so during the day we open up the big wooden doors. I really love it!

You can't really tell from the diagram, but our house is big.  It is HUGE actually.  I will never forget the first time my mom and the Whitely's visited.  It was time for bed and Kathy asked, "What time does the shuttle leave for the bedrooms."  We still laugh about that. :) Our home is almost 2,400 square feet (not including the courtyard, but including the outside laundry room), with all of that being on one level.  Another thing that makes our home appear so big are the high ceilings. As you can see from the diagram, the parlor is the biggest room. The portion of the parlor that butts up to the office is where we have our big dining room table. One gorgeous feature of the parlor is the (almost) floor to ceiling windows that run down both sides of the outside facing walls.  Our view is breathtaking! During the rainy season you can see a big waterfall flowing down the mountainside from the front picture windows. The side picture windows give you a view over the whole village of Bambili. 

The house was built back in 1976 by the late husband of our landlady, but sadly he died before they were ever able to live in the house. Our landlady has a very unique heritage. Her birth parents are British. However, she was adopted as an infant, and her adoptive mother was British and her adoptive father Argentinian. She spent much of her childhood years in a German boarding school in the country of Argentina. She went to university in the U.S. which is where she met her husband...a Cameroonian.  Susan's many European influences can be seen in the building of this house.  The fact that this house has an inside kitchen with cabinets is one influence as most African homes have outside kitchens.  All of the bedrooms have floor to ceiling built-in closets, which is another feature you don't often see in homes here.

I'm so thankful how God orchestrated events and led us to this home. We are so blessed and I'd love to share this blessing with you. So, please stay tuned, because I'm planning to do a post each week, with pictures, about all of the different rooms in our house, so you can actually "see" where we live.  This will have a couple benefits. One, you will get to see our beautiful home. And two, it will give me a reason to deep clean each room and make it presentable for viewing! :)  

Pin It!